EASY NAIL ART AT HOME
Nail art has come full circle again, this time in a different way though. Forget about those little flower designs. Nail art has gotten inspiration from the fashion industry in a big way. Top designers are making sure nails are a part of their shows and pulling nail art looks from their fabrics, style and designs. Some of the designs are really intricate and fabulous so I would definitely treat yourself and come in for a professional nail art design but here is a simple nail art look you can do at home.
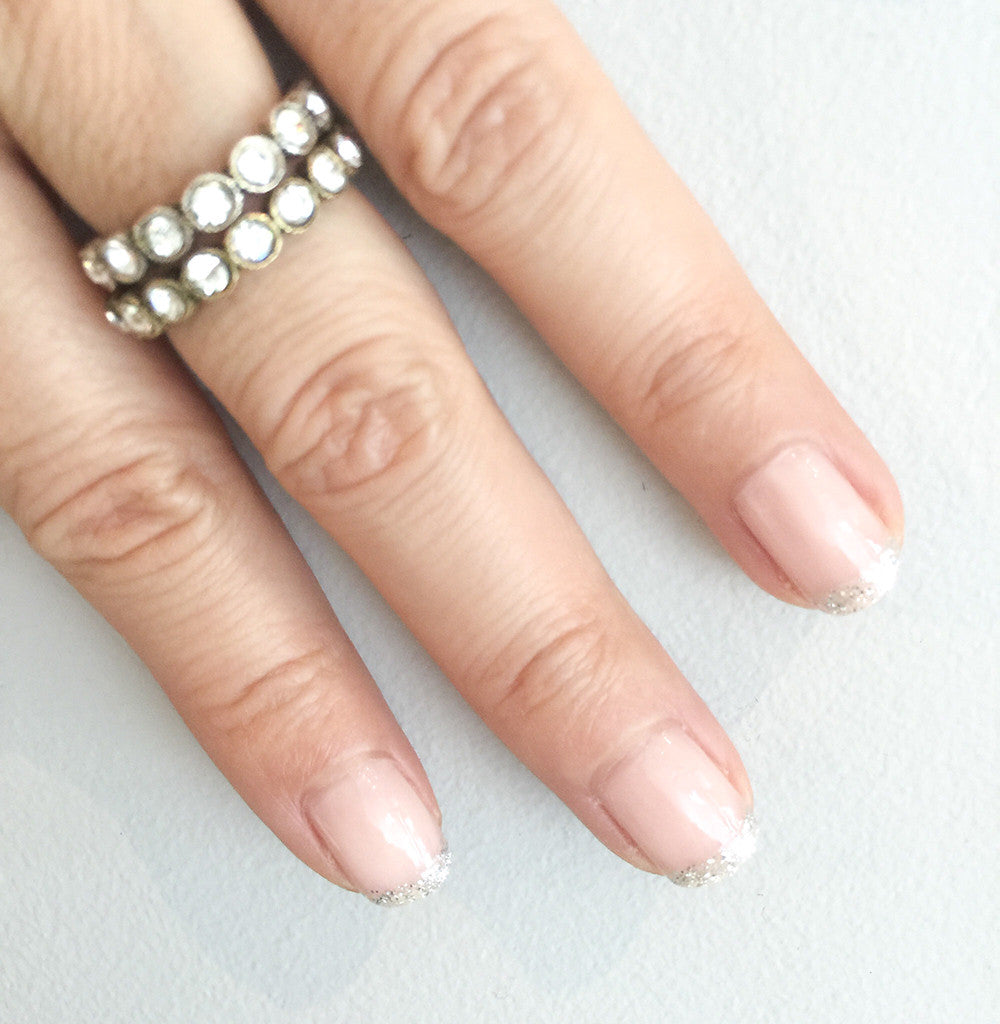
Spring nails are featuring fun designs and fun trends like not you're traditional french manicure. Here's my take on the french manicure with a twist.
Even if you don’t get manicures on a regular basis you should try to get a professional manicure done to maintain the health of your nails. Your hands tell a lot about you and it’s so important to keep them in great shape. We always seem to forget about our nails yet they help us do everything.
Today I will show you how easy it is to do nail art at home. You don’t have to be an artist but you do have to have a steady hand!
FOLLOW BELOW FOR EASY NAIL ART
1. Soak your nails in warm soapy water.
2. Trim and file your nails in a slightly rounded shape.
3. Push back your cuticles gently using a cuticle pusher. Be gentle you don’t want to damage this area as it is sensitive. Do not cut your cuticles! This can cause infections and bacteria. Leave it up to the professionals to trim away dead skin. Cutting your cuticles is not good practice and can cause your cuticles to harden and get thicker. This is why professional manicures are necessary….
4. Buff your nails if you have any bumps or ridges. Use the light side of a nail buffer and be gentle. Wipe away any dust with non-acetone before you polish.
5. Massage your hands with a hand cream I love Tocca’s hand cream. It really moisturizes and makes your hands not only look great they smell delicious.

6. Apply a base coat. If your nails have a lot of ridges use a ridge filler to smooth them out. Base coat is just as important as a topcoat as it primes your nails and prevents any staining from dark colored polishes.
7. Pick 2 colors of nail polish. A neutral color. I chose Opi's Infinite Shine in bubble bath and a glitter one like Smith&Cult's Teen Cage Riot.


8. Apply neutral color once your base coat has dried

9. Take your tip color polish and carefully apply a thin line from left to right at the edge of your nails. Shown here...


10. Once all the fingers are done. Don't forget to apply a topcoat for shine and long lasting wear.
11. Voila a twist on the French mani. Now show off those nails!
Check out one of our YouTube tutorials on a Glitter French Manicure.
Nail art isn’t going anywhere. If anything it’s just going to keep growing. Let fashion inspire you with all the different colors, textures and patterns out there the options are endless.
Life’s too short for boring nails. Do something fun with your nails. I hope you enjoyed this post.
xoxo, MARIE


